-----

-----

March 12, 2012

Broccoli and Chicken Pasta

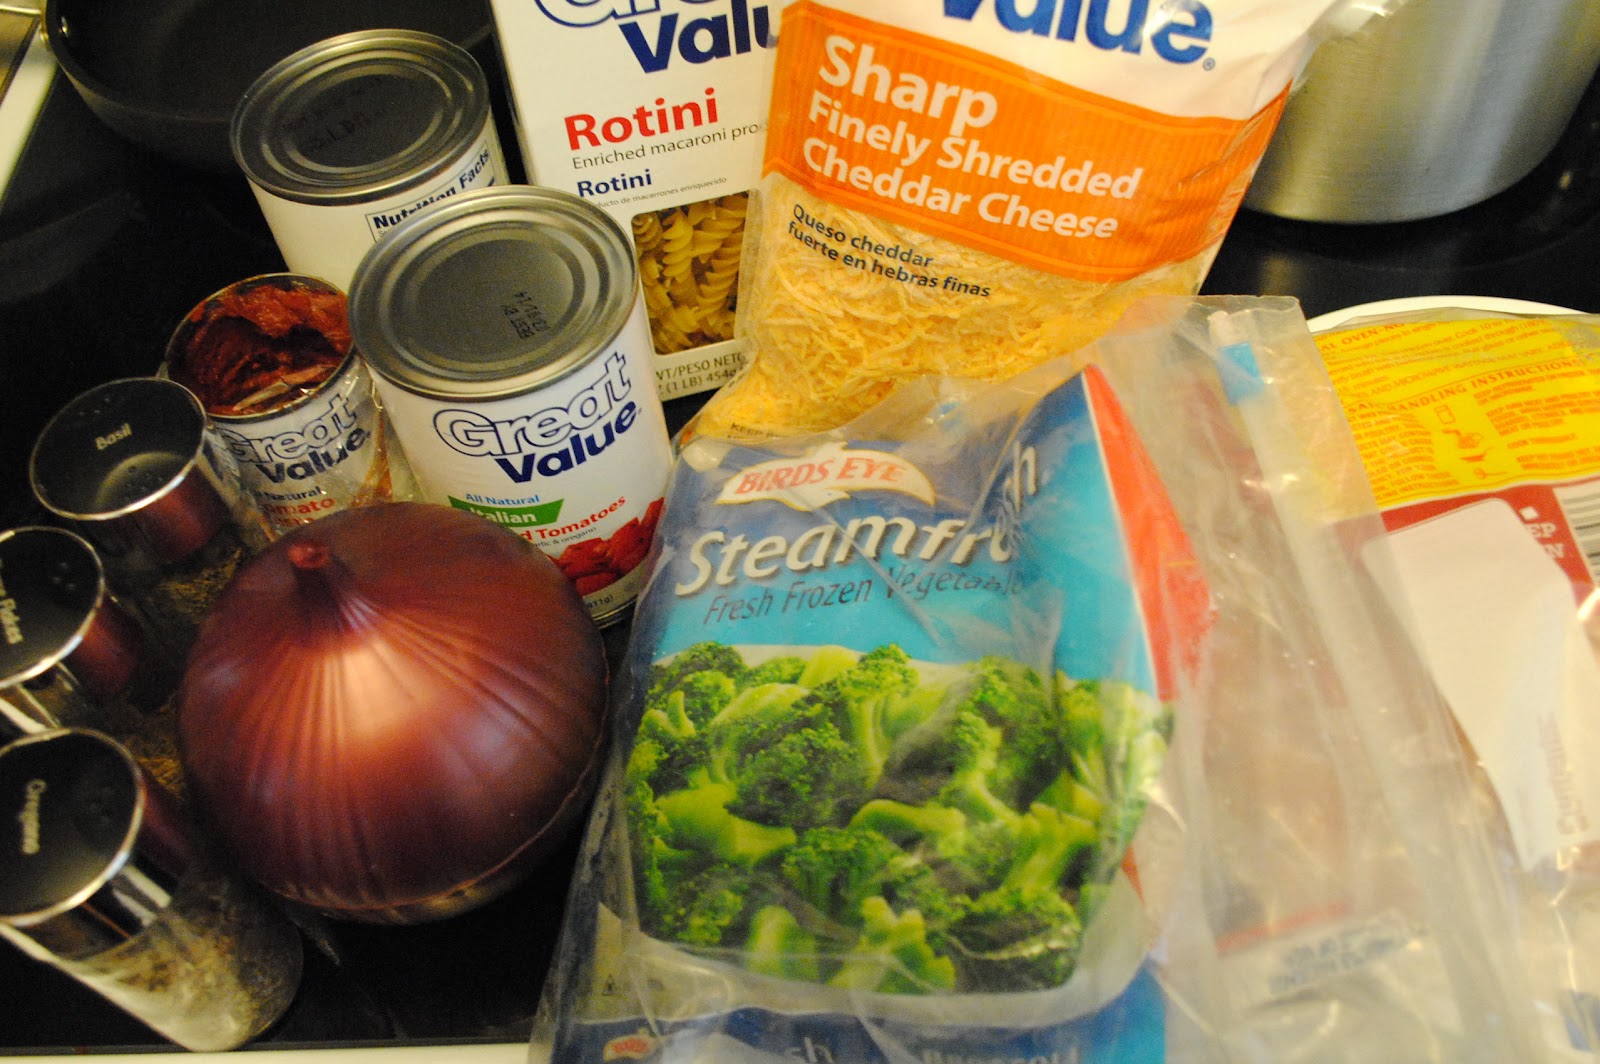
This recipe is from one of my Slow Cooker recipe books. It originally calls for Beef, but Taylor is not a huge beef fan, so I used Chicken. This turned out great, and Taylor liked it! :-D

You will need:
2 cups of broccoli florets
1 medium onion, thinly sliced
1/2 tsp dried basil
1/2 tsp dried oregano
1/2 tsp dried thyme
1 can [14.5 oz] Italian-style diced tomatoes
1 can [14.5 oz] chicken broth
2 large boneless chicken breasts
2 cloves garlic, minced
2 tbs tomato paste
2 cups of rotini pasta
3 oz shredded Cheddar cheese

** If you want to use Beef instead of Chicken use 3/4 cup of beef broth and 1 pound of ground beef.

If cooking with Chicken: 

1. Layer broccoli, onion, spices, tomatoes and chicken broth in crock pot. 
2. Place the chicken and garlic on top of the vegetables. Then cook on High for 4-6 hours. Or until chicken is cooked all the way through. 

*Cooking raw chicken in a crock pot takes longer. Make sure to let it cook thoroughly. 
3. When the chicken is cooked, begin to shred the chicken. 


Then stir in tomato paste, pasta and cheese. Cover and cook for 25-30 minutes. 


4. When serving, add more cheddar cheese and salt & pepper to taste. 


Enjoy! 


*If you don't have all day to let the chicken cook through, cook the chicken first, baking it for 30 minutes on a baking sheet with oil, garlic, salt & pepper, while the vegetables cook in the crock pot. Then, using the beef directions, place the [cooked] chicken in the crock pot and let it cook for 2 hours. 

If cooking with Beef:

1. Layer vegetables, spices, tomatoes and beef broth in crock pot. Cook and cover on LOW 2 1/2 hours.
2. Cook beef and garlic in a large skillet on the stove, until meet is no longer pink. Pour off the drippings/grease. Then add beef to the crock pot and cook, covered, for 2 hours.
3. Stir in tomato paste, pasta and cheese. Cook, covered, for 25-30 minutes, or until cheese is melted and everything is heated all the way through. 

Enjoy!

March 9, 2012

Yarn Wreath

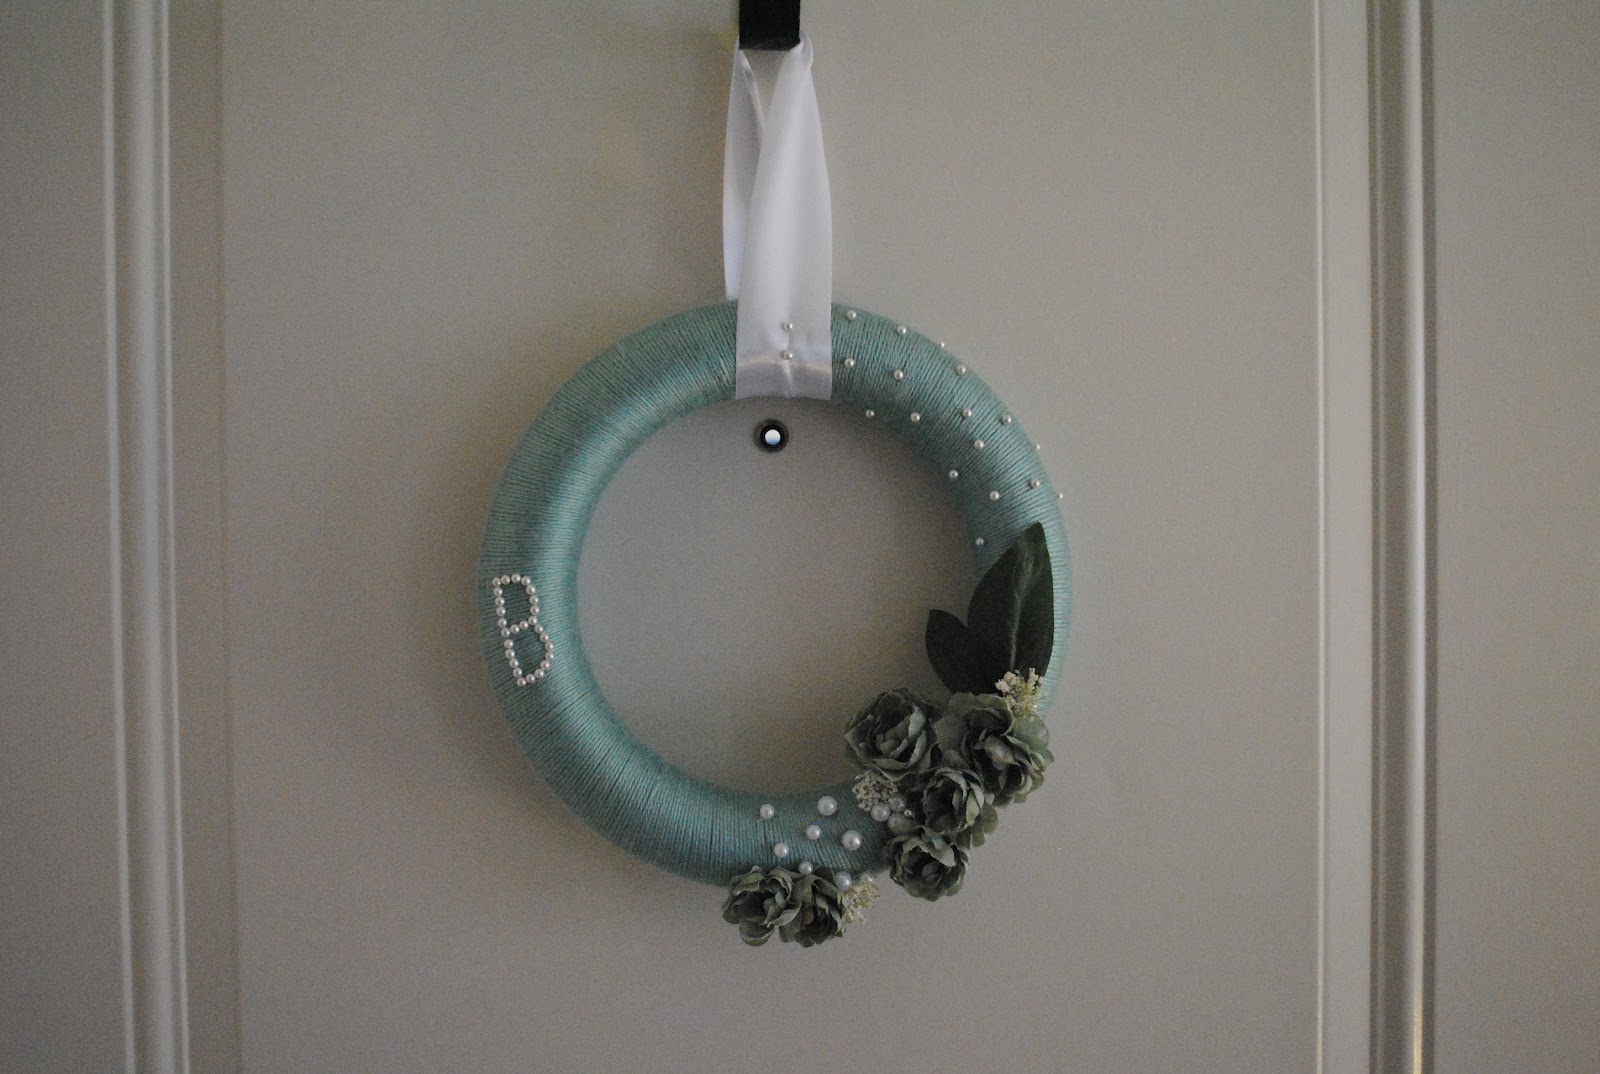
What to do with all those leftover wedding flowers and pearls??? Problem solved! I ordered some wreaths, bought some yarn, and pulled out all my old wedding flowers. This project has been sitting in our living room staring at me for the past few weeks now. I must say, I am glad it is finished because I absolutely adore my wreath!! :)

Here is what you'll need:


A wreath [any size]
Yarn [Your desired color]
Flowers
Pearls
Scissors
Hot glue


1. First, tie the yarn in a double knot around the  wreath. 
2. Second, begin tightly wrapping the yarn around the wreath. Be sure to cover over the tiny piece sticking out from the knot. 

Here, I ran out of yarn. So I did a tiny strip of hot glue and placed the end of that yarn carefully down. Then, adding another strip of hot glue right next to that ending, I put the beginning of a new bit of yarn. [I had to do this a few times]


Almost there! 


After a few episodes of Cake Boss, it is all wrapped!! :-D

Be patient with it all, it takes time. :)


3. Decide where you want to lay out your flowers and begin to hot glue them down.

Have fun with it!!! 


4. After I got my "main" flowers down. I worked on the extra decorations.

[This took the longest because I knew what I wanted, I just had to figure out how to execute it]


5. I decided to then use these pearl push pins to create the letter "B" in honor of our last name!! :)

I just LOVE it!! 


6. Then I went crazy with the push pins and added a bunch at the top right of the wreath.

You can also see I added more flowers, leaves, baby's breath, and more [bigger] pearls to the bunch. 


Ta-Da! 

7. With placing the ribbon for hanging, I simply tied a knot at the top and put 3 push pins in [2 in the front, 1 in the back] to keep it steady. I tucked the knot under the ribbon once it was hung up, so it wasn't all hanging out. 

I think it looks cute. :)


One more [brighter] inside picture. 


Hurray!! 

All hung :) and the husband likes it too! 


The aftermath.... ha! 

March 7, 2012

This will break your heart.

Joseph Kony. . .  watch this video and learn about him. Children are being abducted. . . YOUNG GIRLS are being trafficked for SEX. Boys are being taught how to shoot guns to KILL. . . even kill their parents. All because of this one man. I think about that with tears. What if that was one of my nephews? What if that was my friends daughter? What if that was MY child?

I believe there are other people out there that are like Joseph Kony. But he is a huge target right now. And in stopping him, could bring FREEDOM

Let's make Joseph Kony famous


KONY 2012 IS A FILM AND CAMPAIGN BY INVISIBLE CHILDREN THAT AIMS TO MAKE JOSEPH KONY FAMOUS, NOT TO CELEBRATE HIM, BUT TO RAISE SUPPORT FOR HIS ARREST AND SET A PRECEDENT FOR INTERNATIONAL JUSTICE.


Visit Invisible Children's site here to sign the pledge.

Micah 6:8 
"He has told you, O man, what is good; and what does the LORD require of you but to do justice, and to love kindness, and to walk humbly with your God?"

March 5, 2012

Fix it & Forget it

Quick & easy dinners are a goal of mine. Here is a quick meal. A fix it and forget it, Stephanie style :) with only 3 ingredients! And it was GOOD


You will need:
2 or 3 Boneless Chicken Breasts
1 [14.5 oz] can of Chicken Broth
1 Italian Seasoning packet 


1. Place your chicken in your crock pot. 
2. Add the chicken broth & seasoning packet. *The broth wasn't enough liquid, so I also filled the can up with water and dumped it in.
3. Cook on low for 4-5 hours. [Or until the chicken is fully cooked through].
4. Carefully remove the chicken from the crock pot, serve & enjoy!!

I served this over rice with a side of broccoli. It was delicious and the chicken fell right apart!

[Sorry I don't have a finished picture]


March 2, 2012

Freezer meal - Pork Chops

My sweet sister-in-law made a huge list of freezer meals for me, and the pork chops were a hit. This recipe couldn't be easier, really! All you do is add the ingredients with the meat and freeze. I'll give you the original recipe, and another I tweaked a bit for a different flavor. Both are so yummy and really you could play around with it in so many ways. I'd love to hear what you try!

Pork Chops

You will need:

Pork Chops [I split this pack up 4 in one bag, 3 in the other]
1/2 cup Balsamic Vinegar
1/2 cup Olive Oil
4 cloves Garlic, chopped
1 tablespoon Sugar
1 teaspoon Salt
1/2 teaspoon Pepper
1 tablespoon Thyme

1. Place the pork chops in your freezer bag.

2. Add all the ingredients.


3. Close the bag keeping some air in the bag. Mix together, massaging the ingredients into the meat. Write the meal & date on the bag. Place in the freezer.


Can it get easier than that??? I think not!


The other recipe - Everything stays the same except I took out the balsamic vinegar and used Worchestire Sauce, dash of red pepper flakes and NO SALT! The Worchestire Sauce has enough salt. We had this the other night and both really liked it. So now, we have 2 pork chop flavors! Easy Easy Easy!

* 1/2 cup Worchestire sauce, dash of red pepper flakes, no salt *


Cooking the meat - Take the meat out and thaw. Dump the chops & juices in an oven pan and broil for 10-15 minutes. And Voila!


Enjoy! 

February 28, 2012

Weekend Adventures with Miss Moo, Mindy & Aprons

Miri, "Miss Moo", is Taylor's and my little sister. [Taylor's real sister and mine by law love]. Gisele and Bill went away for the weekend together, which meant we got to hang out with Miri day and night, Saturday - Monday. We always have fun with her. This not-so-little girl makes us laugh! A lot!! She is a JOY!

We went for a bike ride, watched Puss and Boots, made a "fort", made a ton of popcorn, went to church, played with Mocha, played Tiger Woods golf - a lot ;), had steak for dinner, painted our nails and watched the Oscars.

Here are some pictures from our time together. . .


We LOVE you, Miri!!! 


On Monday, after leaving the Brown's, I went to visit Mindy Coleman & her baby Isaac. Read about his story here. *Seriously, you want to read their sweet story!!!* 


This was my first time meeting their teeny guy, and let me just say, HE IS THE MOST PRECIOUS BOY!!! He is so tender and happy! It was an honor holding him. :) And I had such a wonderful time of fellowship with Mindy! God is good!! 


Last, but certainly not least, my ever so sweet & amazing Grandma Mosa sent me some pretty "sick-nasty-awesome" [in my brother-in-law's words] aprons. I have a thing for the older classic generation. The colors [even green shabby carpet], the designs, the art, etc. My Grandma Mosa has a ton of things that I LOVE! These aprons are a treasure to me! . . . Here they are :)

These aprons were my Great Grandmas aprons. And now, my Grandma is passing them onto me. :-D *PURE JOY* The sagey green & purple one she gave me as a wedding gift. The other four I got in the mail today. Also, I think it was the purple one that my Great Grandma baked my Grandma's wedding cake in. How happy is that?!!! 

That, my friends, was a wonderful weekend! :)


February 27, 2012

Honey Wheat Bread

I have really begun to enjoy baking breads [when they turn out correctly ;) ]. So far, this Honey Wheat Bread recipe [thank you pinterest] has been our go to bread. It is so so delicious and super easy to make. I hope you enjoy it :)


Tay turned this on while I baked. . . which made everything more fun!


Honey Wheat Bread

What you need:

1 cup warm water
1 tbs milk
2 tbs oil
2 tbs honey
2 tbs brown sugar
1 tsp salt
1 1/2 cups all-purpose flour
1 1/2 cups whole wheat flour
2 tsp instant active dry yeast
Optional: 3 tbs rolled oats [more or less depending on preference] *The bread is really good plain, that is usually how I make it, I am just experimenting with the Oats.


*Bake at 350 degrees


1. Combine the first 6 ingredients in a Kitchen Aid mixing bowl, using the flat beater.


2. Switch to the dough hook at this point, and add the flours and yeast, and knead until the dough is smooth and elastic. About 10-15 minutes.

3. Place the dough in a greased bowl, turning once to grease the top. Cover with a clean towel and let rise, about 40 minutes.

4. Punch the dough down and knead. Then form into a loaf and place it into a greased pan. If you are putting oats on top of the loaf, grease the pan then add wax paper and lightly grease the wax paper, then place the dough into the pan and form loaf. It will make removing the loaf easier, so you don't have to flip it over to remove, you can just pick it up using the wax paper. Thus keeping the oats on top. :)

5. After you place the dough in the pan, cover it with the towel and let it rise in a warm place for about 30 minutes.


6. If you want oats on top: Before placing the loaf in the oven, drizzle honey over the top and carefully spread it around, then top with the oats.


7. Place in the oven and bake for about 35-40 minutes.

*If you are not using Oats, bake for 30-35 minutes.

8. Remove the bread and let it cool for a few minutes. Then remove to a wire rack to let cool.


9. Slice & Enjoy!!